
0. 效果展示
下图展示了在多个faceplate中,打开对应元素的弹窗,来查看详细参数。
1. PLC侧配置
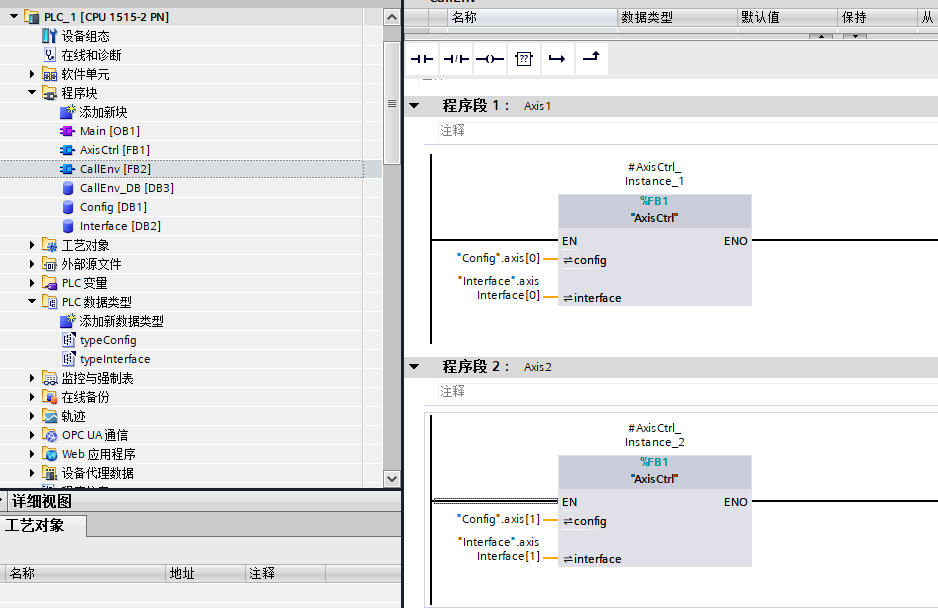
- PLC侧建立一个轴控FB,设置两个输入输出数据类型。
- 程序内简单写入逻辑,如下图所示
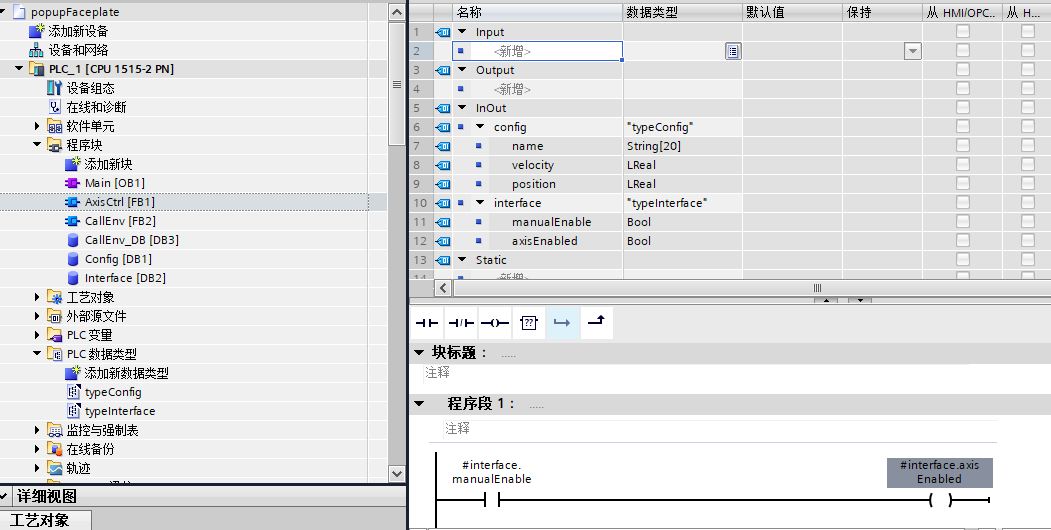
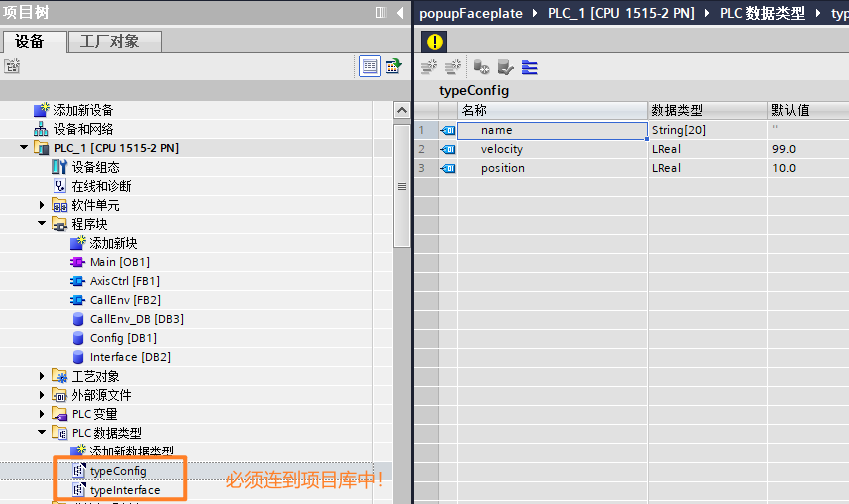
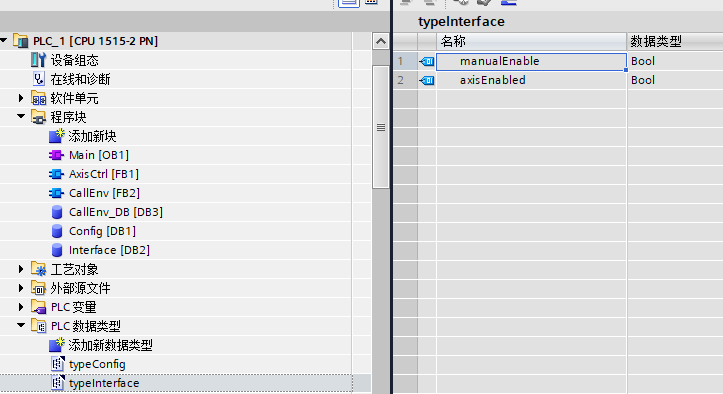
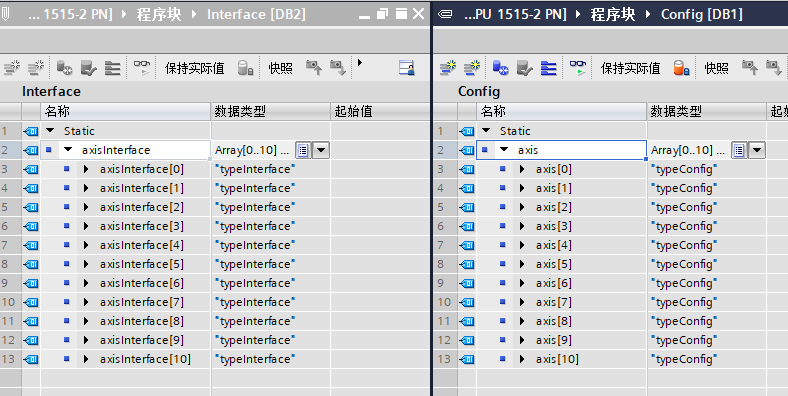
- 数据类型分为两类,一个是typeConfig,一个是typeInterface。前者存放轴的配置参数,后者存放轴的手动使能按钮,供HMI使用。
- 建立两个数据块Config和Interface存放轴的参数。
- 在PLC侧,调用轴控块三次,调用次数取决你实际的项目轴数。
2.HMI侧配置
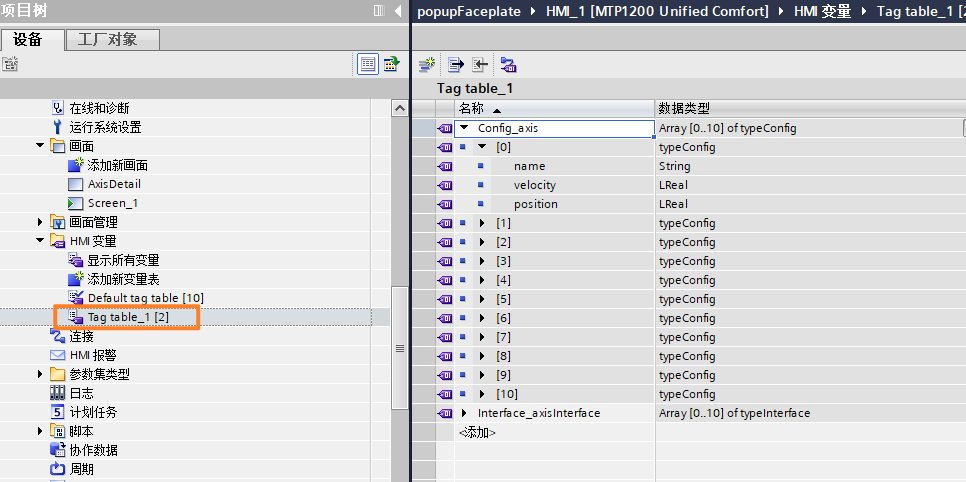
- 连接config和interface两个DB的变量
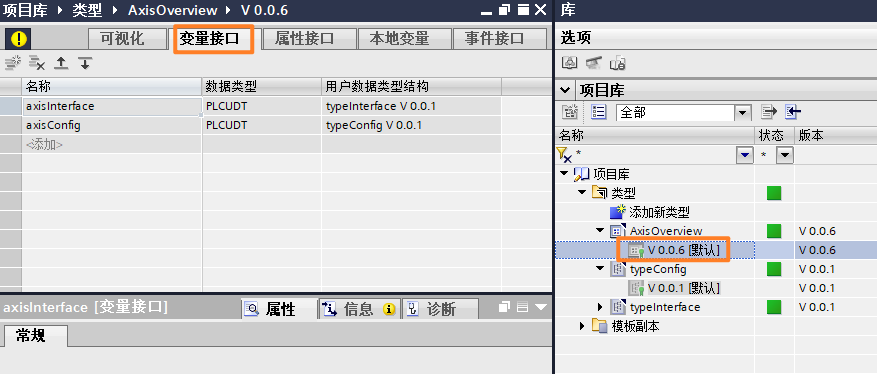
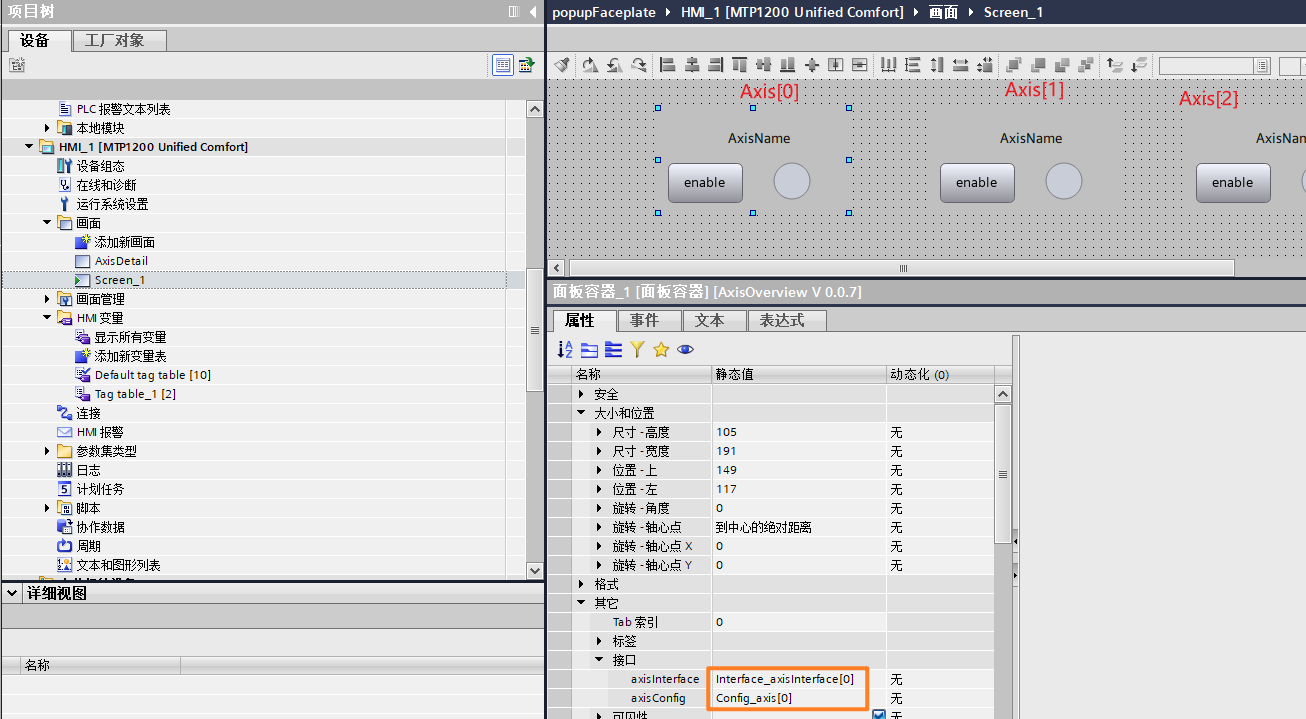
- 制作轴控的overview faceplate接口
在faceplate中的变量接口,选择PLCUDT,然后选择项目库中的数据类型。
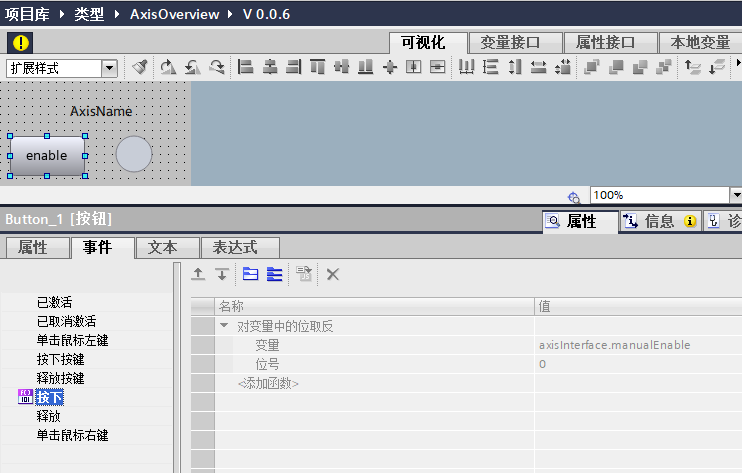
- 制作faceplate的画面元素
使能按钮事件:对interface接口的使能变量取反
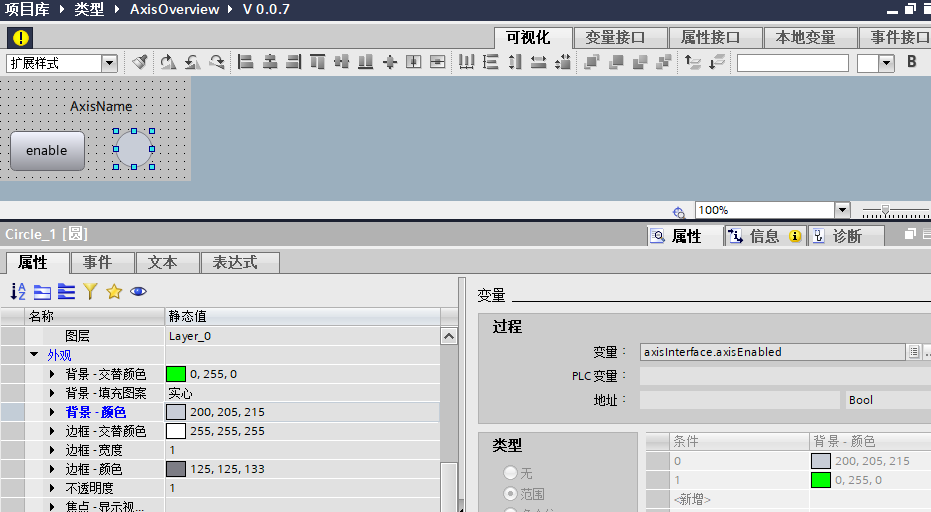
轴已使能的指示,选择背景颜色属性,并连接对应的变量
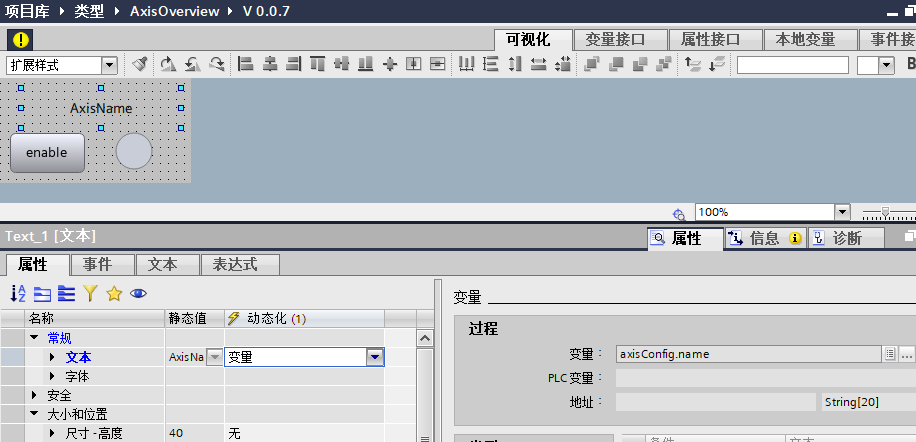
轴名称的变量连接
- 制作faceplate的弹窗事件
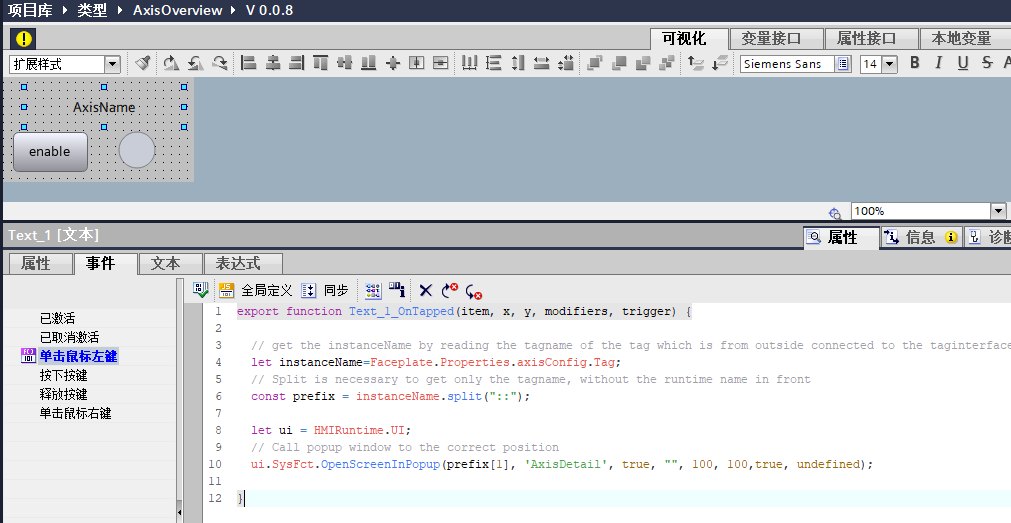
  // get the instanceName by reading the tagname of the tag which is from outside connected to the taginterface structure "axisConfig"
  let instanceName=Faceplate.Properties.axisConfig.Tag;
  // Split is necessary to get only the tagname, without the runtime name in front
  const prefix = instanceName.split("::");

  let ui = HMIRuntime.UI;
  // Call popup window to the correct position
  ui.SysFct.OpenScreenInPopup(prefix[1], 'AxisDetail', true, "", 100, 100,true, undefined);
- 发布faceplate后,在主画面调用三次,并接入三个轴的接口(注意数组指针)
- 创建轴参数的详细页面
新增一个页面,名称是AxisDetail
如下图所示创建元素,不需要连接任何变量
在画面的加载事件中添加如下JS代码:
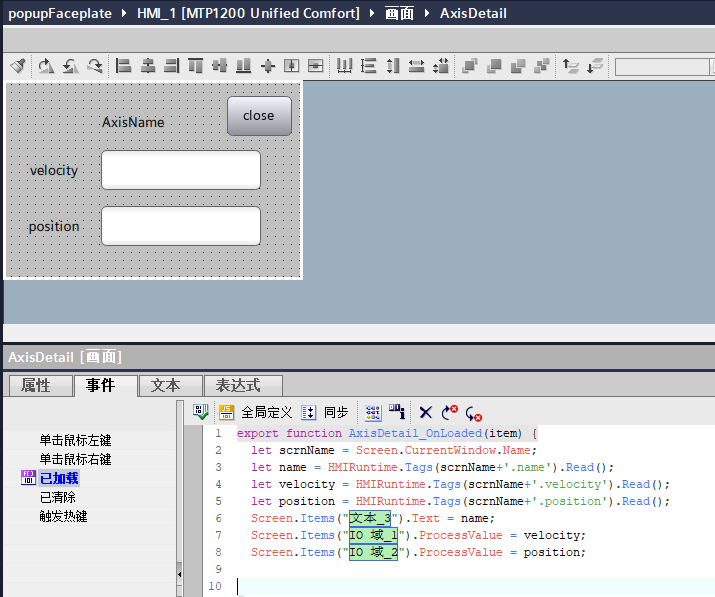
  let scrnName = Screen.CurrentWindow.Name;
  let name = HMIRuntime.Tags(scrnName+'.name').Read();
  let velocity = HMIRuntime.Tags(scrnName+'.velocity').Read();
  let position = HMIRuntime.Tags(scrnName+'.position').Read();
  Screen.Items("文本_3").Text = name;
  Screen.Items("IO 域_1").ProcessValue = velocity;
  Screen.Items("IO 域_2").ProcessValue = position;
- 在详细页面中添加close按钮,用来关闭弹窗
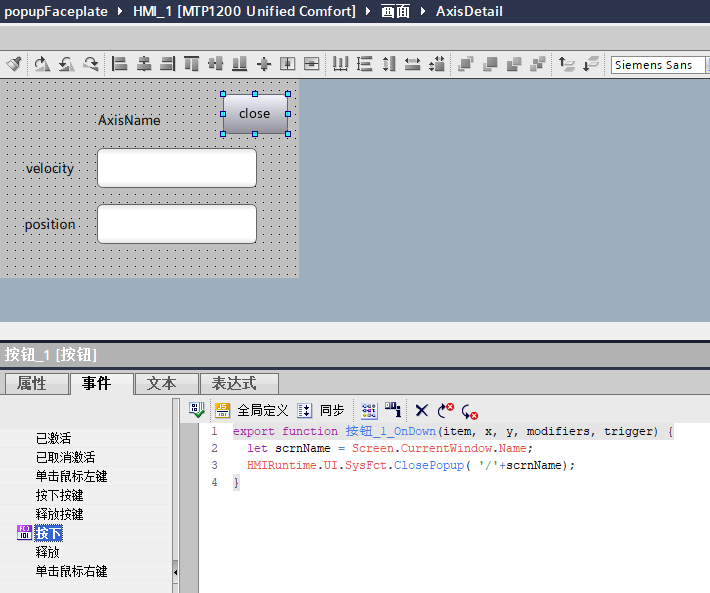
  let scrnName = Screen.CurrentWindow.Name;
  HMIRuntime.UI.SysFct.ClosePopup( '/'+scrnName);
3. JS解析
  // get the instanceName by reading the tagname of the tag which is from outside connected to the taginterface structure "axisConfig"
  let instanceName=Faceplate.Properties.axisConfig.Tag;
  // Split is necessary to get only the tagname, without the runtime name in front
  const prefix = instanceName.split("::");

  let ui = HMIRuntime.UI;
  // Call popup window to the correct position
  ui.SysFct.OpenScreenInPopup(prefix[1], 'AxisDetail', true, "", 100, 100,true, undefined);
上面是第一段JS,首先需要通过faceplate中的属性接口,读取axisConfig的变量值。
注意这里axisConfig是一个对象,需要利用.Tag读取他的变量值
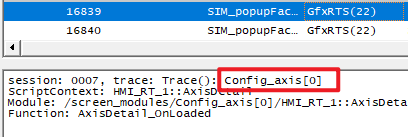
通过HMIRuntime.Trace方法来查看一个这个instanceName, 如下图所示,插入Trace方法,查看变量及数据类型
 let instanceName=Faceplate.Properties.axisConfig.Tag;
HMIRuntime.Trace(instanceName)
HMIRuntime.Trace(typeof instanceName)
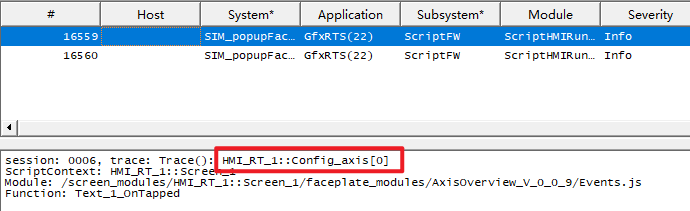
![[Pasted image 20240718135049.png]]
可以发现,读到的String是"HMI_RT_1::Config_axis[0]"
所以需要对该String进行处理,通过字符串的split方法来获得数组。
const prefix = instanceName.split("::");
prefix[0]="HMI_RT_1"
prefix[1]="Config_axis[0]"
然后使用打开弹窗方法
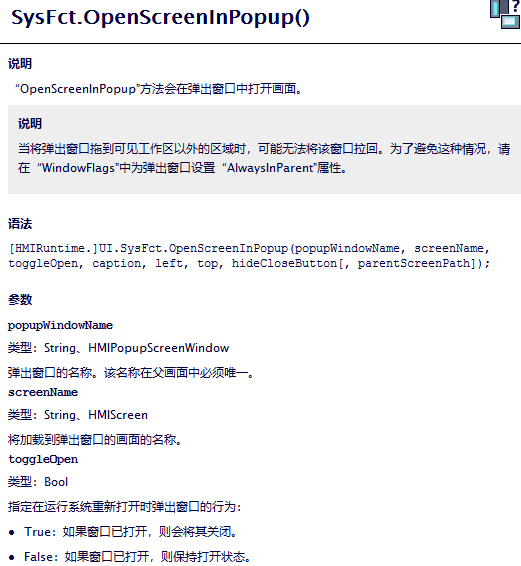
这里的脚本为HMIRuntime.UI.SysFct.OpenScreenInPopup(prefix[1], 'AxisDetail', true, "", 100, 100,true, undefined);
第一个参数:prefix[1]是变量值,非常重要!通过第一个参数,popupWindowsName传递给弹窗
第二个参数:需要打开的画面。使用轴的详细视图页面,注意这里需要字符串。必须加上''。
第五个和第六个参数是弹窗的左边距和上边距。可以通过其他计算调整,本文不做展开。
  let scrnName = Screen.CurrentWindow.Name;
  let name = HMIRuntime.Tags(scrnName+'.name').Read();
  let velocity = HMIRuntime.Tags(scrnName+'.velocity').Read();
  let position = HMIRuntime.Tags(scrnName+'.position').Read();
  Screen.Items("文本_3").Text = name;
  Screen.Items("IO 域_1").ProcessValue = velocity;
  Screen.Items("IO 域_2").ProcessValue = position;
第二段JS代码解析:
let scrnName = Screen.CurrentWindow.Name;
该行代码是获取当前页面的名称,也就是弹窗的Name。这个变量来自于打开弹窗时传入的第一个参数。
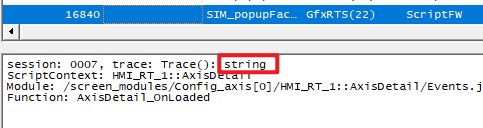
注意这个变量是一个字符串类型。同样可以通过Trace方法进行测试。
  let scrnName = Screen.CurrentWindow.Name;
HMIRuntime.Trace(scrnName);
HMIRuntime.Trace(typeof scrnName);
通过Trace软件可以看到结果是"Config_axis[0]"和string
然后就是通过读取变量方法,在Runtime中读取这个HMI变量。
HMIRuntime.Tags('你想读的变量名').Read()
但是因为无法直接读取数据类型变量。所以需要对"Config_axis[0]"进行字符串拼接。
JS中最简单的字符串拼接方法是使用+来连接。
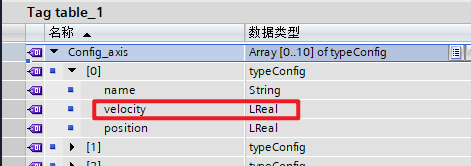
所以"Config_axis[0]"+'.velocity'就可以拼接成"Config_axis[0].velocity'
对应变量表的变量:
读取完变量后就可以写入元素的属性。
通过Screen.Items()方法,写入对象属性
Screen.Items("你要找的对象").Text=变量值